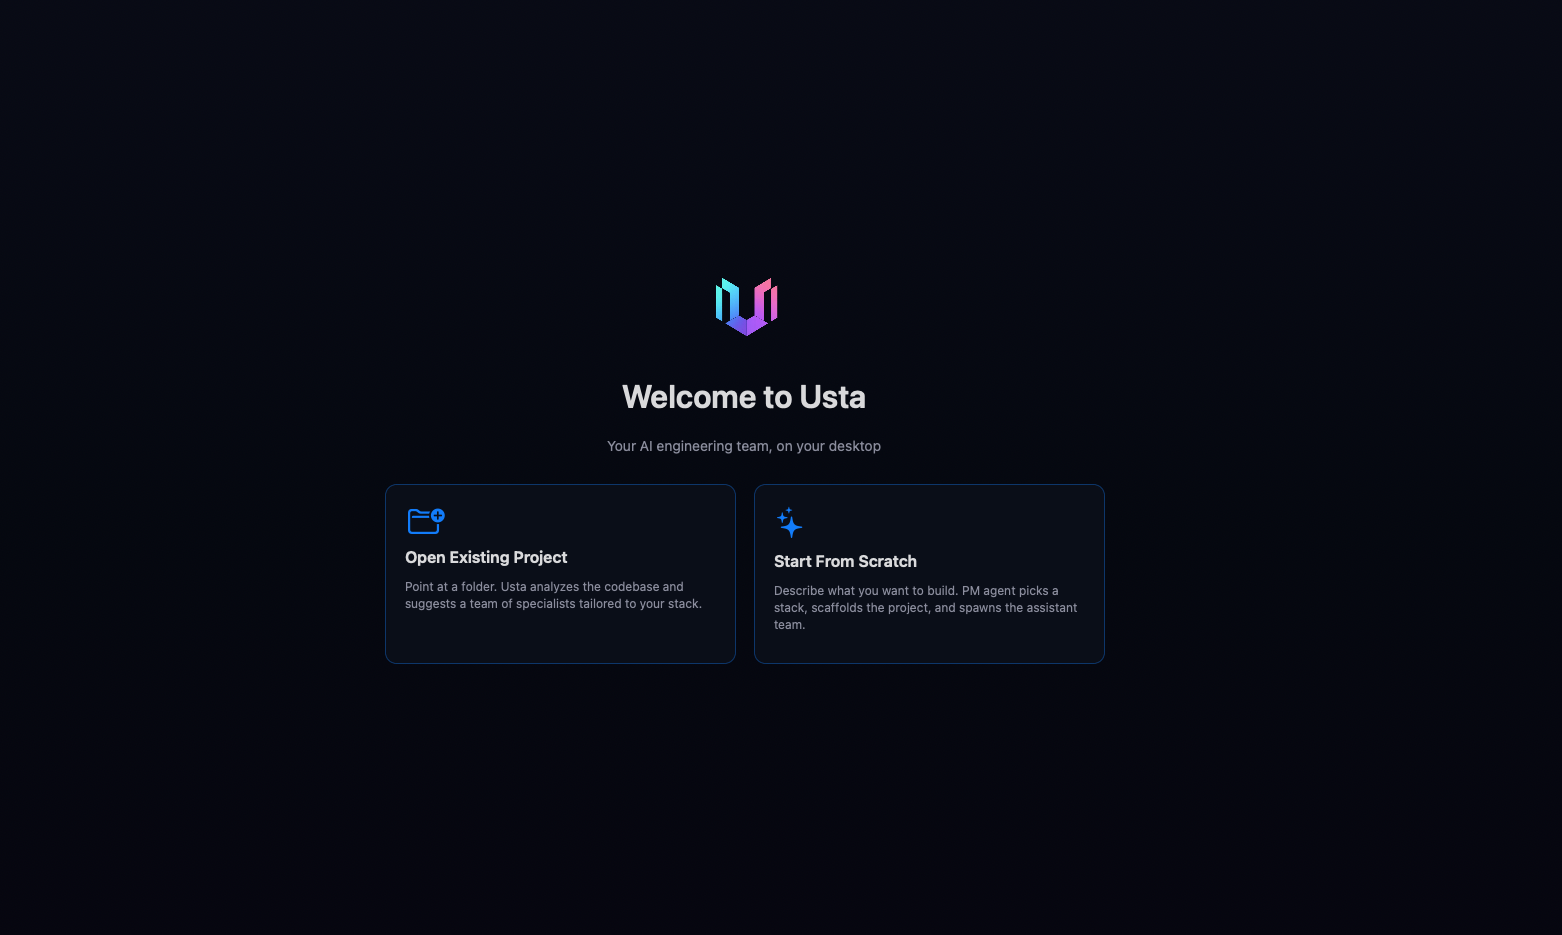
Welcome — pick how you start.
When you launch Usta you get two entry paths. Both lead to the same workspace experience — they differ only in how the PM agent learns what you're building.
- Open Existing Project — point Usta at any folder. The PM scans the codebase and proposes a team that fits the stack it finds.
- Start From Scratch — describe what you want to build. The PM picks a stack, drafts a folder layout, and assembles a team.
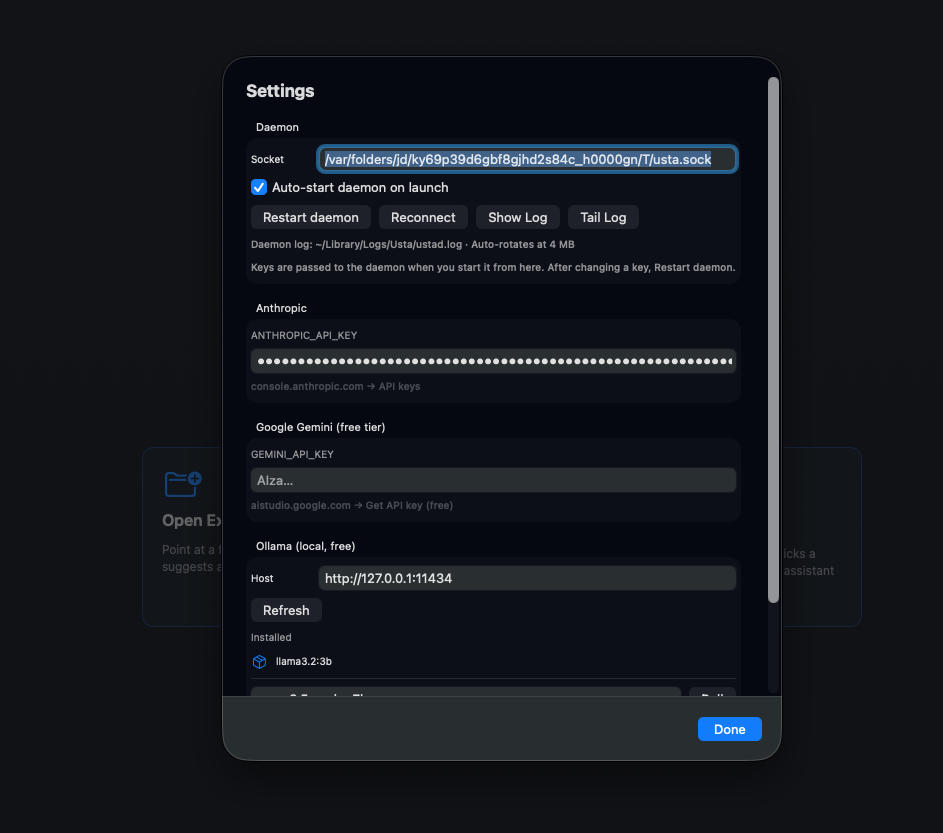
Settings — paste your API keys.
Click the gear icon (top-right). You can mix and match providers — different roles can use different LLMs.
- Anthropic — paste your
sk-ant-…key. Stored in macOS Keychain, never on disk. - Google Gemini (free tier) — get a key from aistudio.google.com. Generous free quota.
- Ollama (local, free) — Refresh detects locally installed models. Pull from the box if missing.
The daemon log lives at ~/Library/Logs/Usta/ustad.log. The Show Log / Tail Log buttons open it instantly. When you hit Done, the daemon restarts with the new keys.
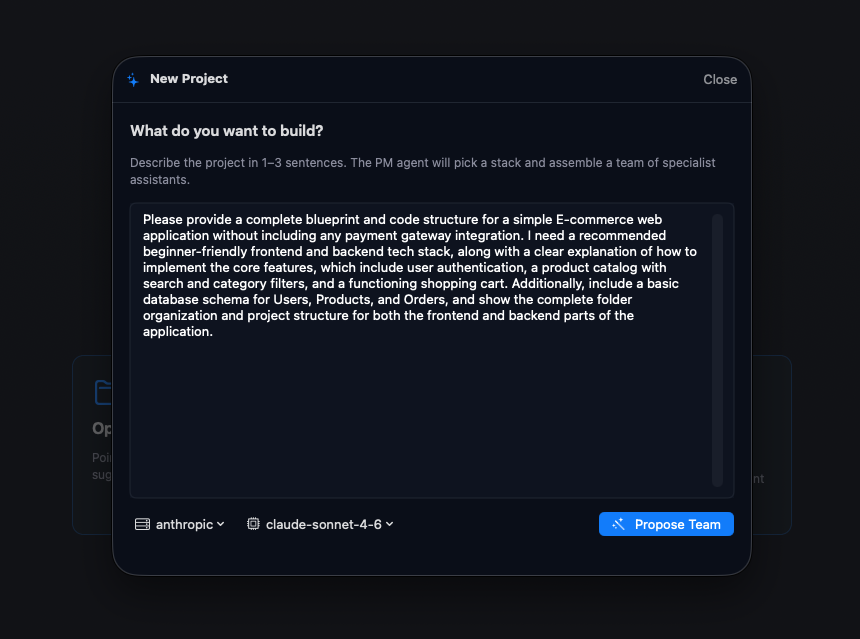
Describe what you want to build.
One field, 1–3 sentences. The clearer your description, the better the team. Pick the provider + model used to plan (defaults to anthropic / claude-sonnet-4-6). Hit Propose Team.
PM proposes a team.
The PM picks a name (ShopHub in this case), drafts a one-paragraph project summary, picks a stack — Next.js 14 + React 18 + TypeScript + Tailwind, Node.js + Express backend, PostgreSQL + Prisma, NextAuth v5, Zod, Jest + Playwright — and lays out first steps in plain English: who does what, in what order, what they hand off.
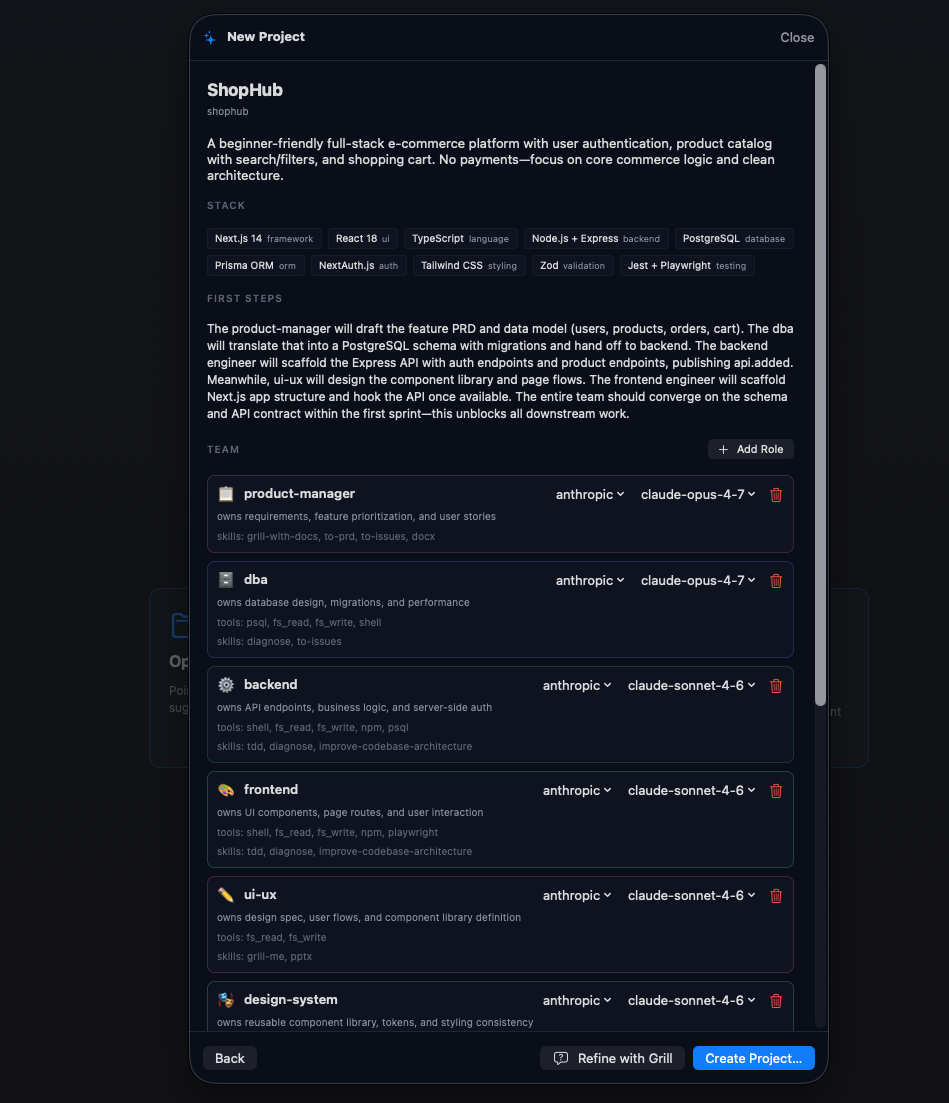
Review and edit the team.
The proposal is editable. Scroll down to see every role with its provider/model picker, tools, and skills:
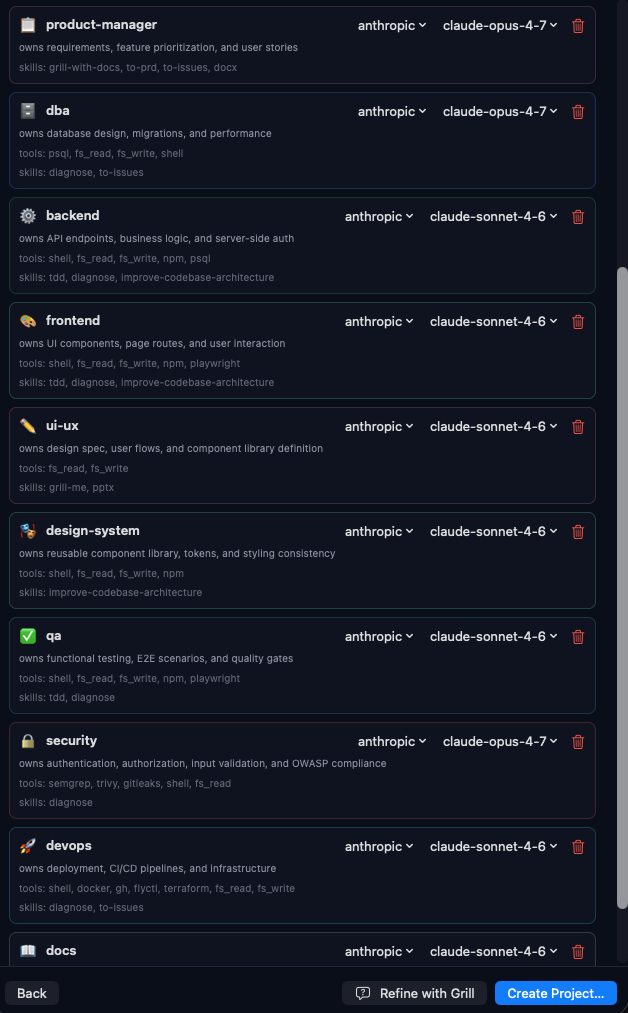
- Provider / model picker on each row — swap to Gemini, Ollama, claude-opus, whatever fits.
- Tools / skills — what the role can do:
shell,fs_read,fs_write,npm,playwright, … - Trash icon — drop a role.
- + Add Role — opens a full editor for a new specialist:
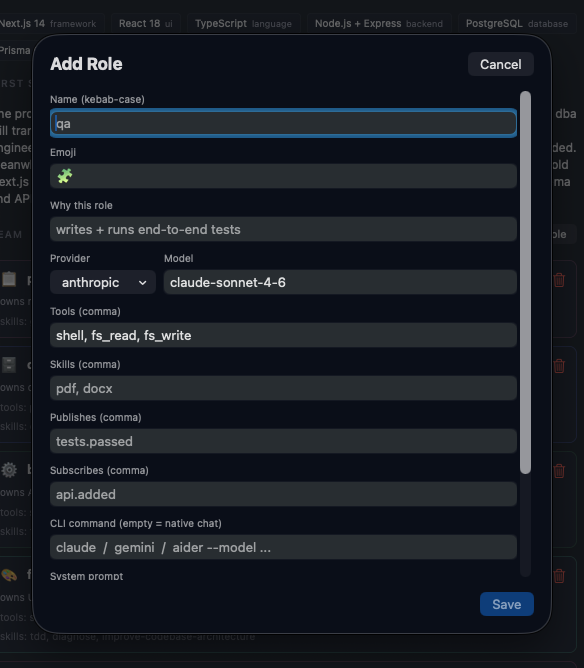
Name + emoji + why this role + provider/model + tools + skills + which events it publishes + which events it subscribes to + optional custom CLI command + system prompt.
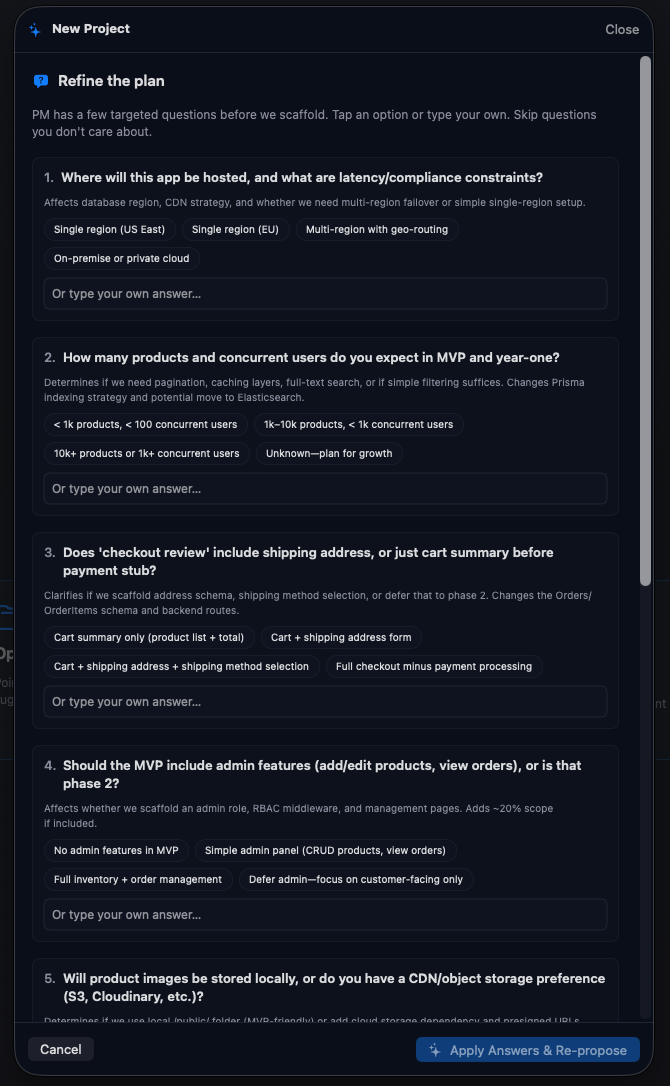
Grill — sharpen the plan before code.
If you'd rather the PM ask sharper clarifying questions before writing any code, hit Refine with Grill. You get a focused Q&A like:
- "Where will this app be hosted? Will it have latency/compliance constraints?"
- "Should 'checkout review' include shipping address, or a summary before payment?"
- "Should the WIP include role-based features (admin/editor/viewer)?"
Your answers go straight into each role's brief. When you're happy with the plan, hit Create Project…. Usta scaffolds the repo, writes the role YAMLs, and drops you into the workspace.
The workspace — your team, working.
Each card is one specialist running its own real PTY (Claude Code, Gemini, or Ollama). The blue banner at the top is the Next Action — the PM tells you which role should act next and gives you a one-click generated prompt.
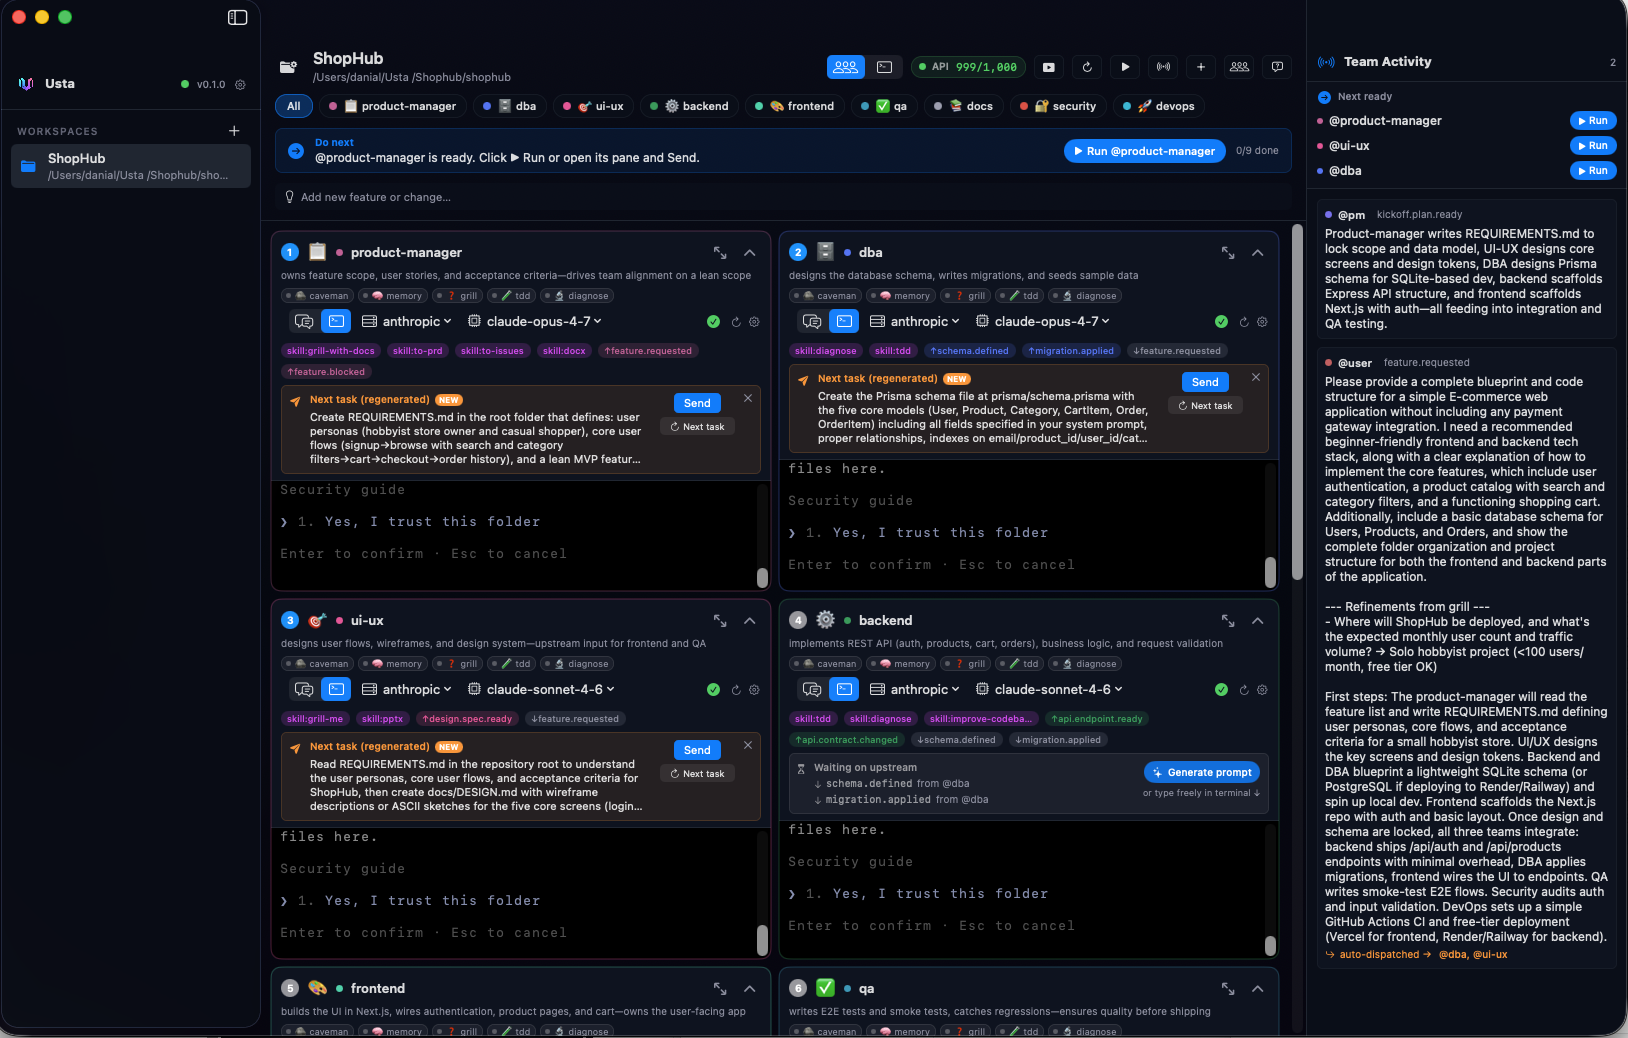
Top toolbar (zoom):

- All / per-role chips — filter the grid by role.
- API 999 / 1,000 — live Anthropic rate-limit counter. Never burst-fails.
- Run App — boots whatever dev server the project scaffolded.
- Refresh — re-scan the event bus.
- Start Team — kicks off all roles in dependency order.
- Hide Activity — collapse the right-side feed.
- Add Role — spawn a specialist mid-project.
- Apply Team — re-apply role YAMLs after edits.
- Grill More — get the PM to ask sharper questions about the current state.
Focus a single role.
Click the maximize button on any pane to focus one specialist full-screen. The terminal is a real PTY — keyboard shortcuts, scrollback, everything. The blue banner above shows the scoped task the PM gave this role.
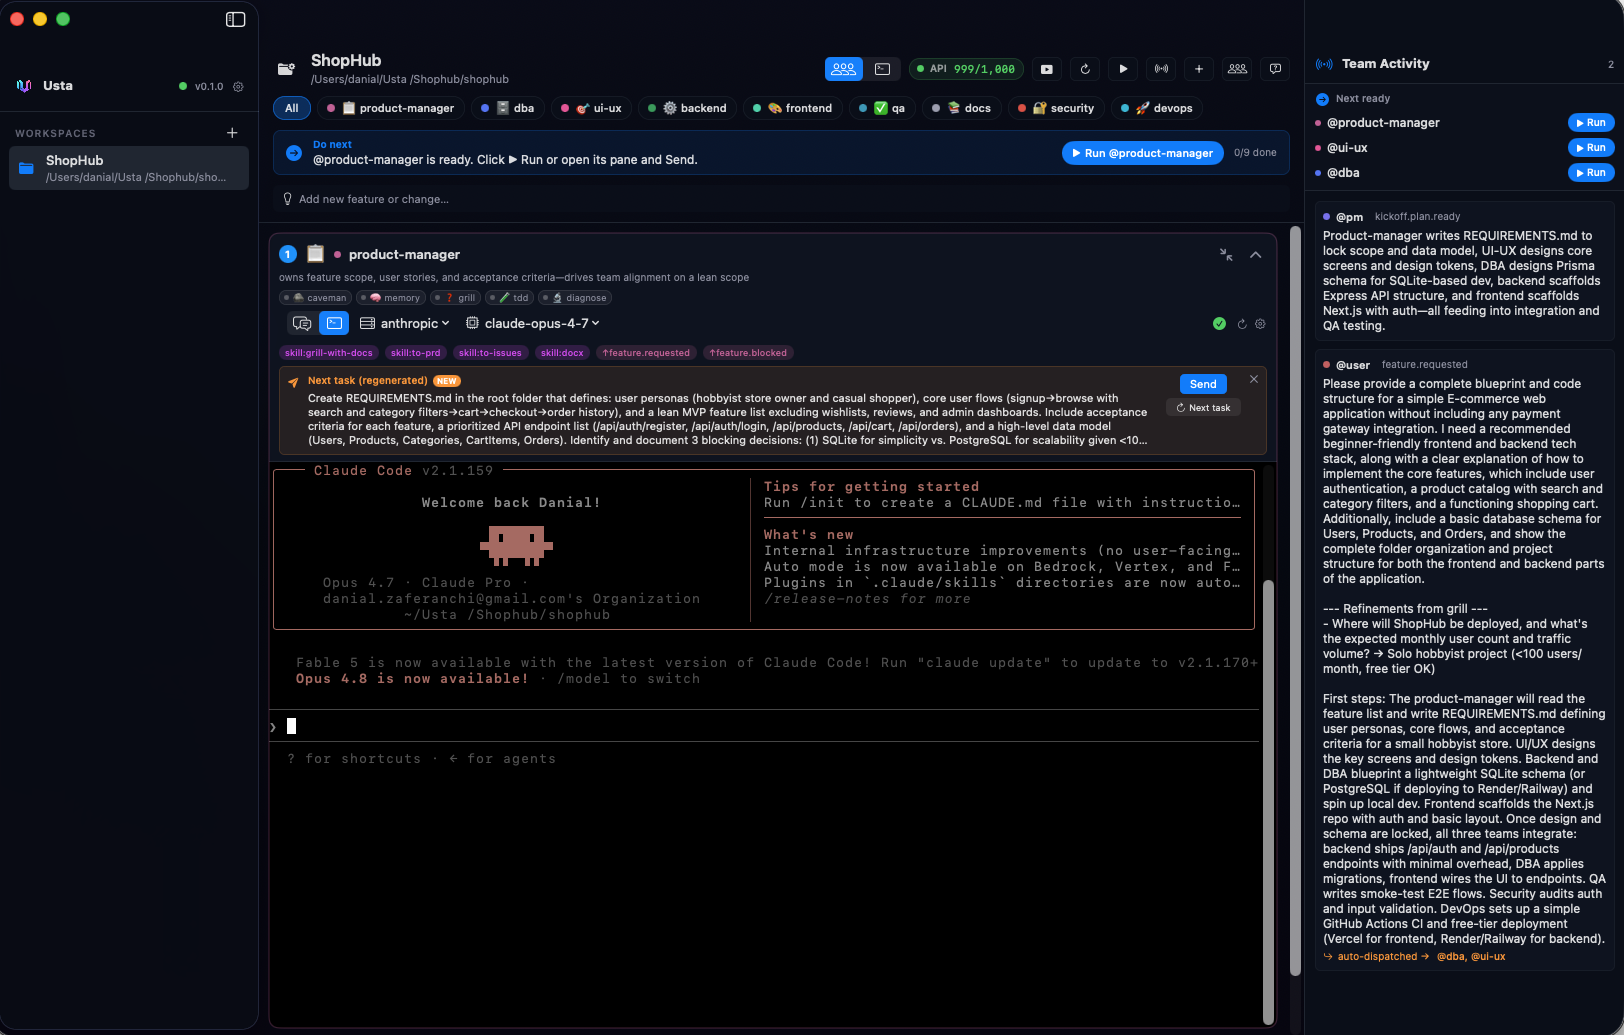
Skills row (zoom) — pre-loaded skills you can invoke with one click:

caveman— terse mode (cuts tokens ~75%)memory— persistent notes across sessionsgrill— request more clarificationtdd— test-driven workflowdiagnose— root-cause analysis mode
The role's YAML decides which skills are active by default; click any chip to invoke it manually.
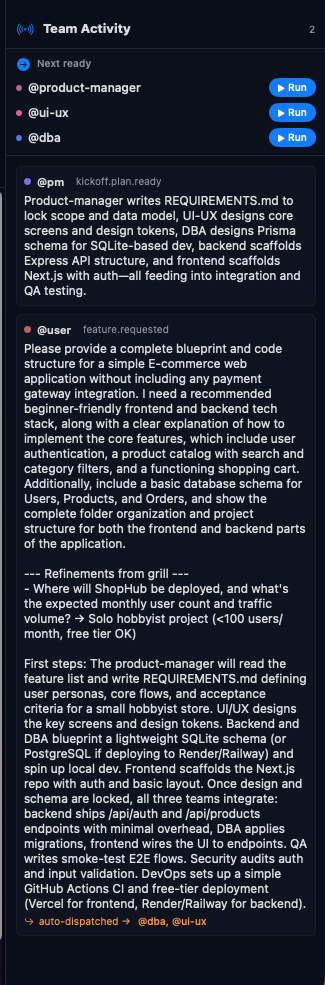
Watch the event bus.
The right-side Team Activity panel is the source of truth. Every event published on the bus appears here in order. When a role announces api.added, every subscriber to that topic wakes up automatically — no manual hand-off.
If a role goes idle without publishing anything, the idle watcher tails the PTY output, infers what was announced, and publishes it on your behalf.
Ship a new feature.
Type any request in the "Describe the new feature or change…" bar at the top. PM re-plans which roles need to act for just that change, publishes scoped tasks, and only those roles wake up. Roles that were already done stay done.
Pick a target role from the dropdown (default: → @product-manager) or let the PM decide who handles it.
